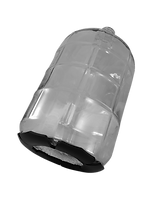
The Carboy Bumper
Protect yourself. Protect your gear. Protect your beer.

How-to install
Carboy Preparations
-
Ensure empty carboy and Carboy Bumper are at room temperature (50-75ºF).
-
Secure empty carboy so that the bottom is easily accessible before and during installation.
-
Important! The carboy surface must be kept dry and free of dirt, oil, and debris.
-
Plan out Carboy Bumper pad locations and pattern to ensure even spacing.
-
Clean locations where pads will be placed with a clean lint-free cloth using rubbing alcohol. Do not use paper towels or tissues.
-
Allow the surface to completely dry (about 10-15 minutes)
Carboy Bumper Layout Preparations
-
Locate the bottom edge or apex on the bottom of your carboy and align with the notches of the Carboy Bumper (Figure A).
-
Remove the adhesive backing liner from a Carboy Bumper pad. Prevent the exposed adhesive from contacting anything other than the chosen location.
Attaching the Carboy Bumper
-
Align the Carboy Bumper pad with the carboy and apply pressure firmly and evenly working from the bottom center of the carboy outwards following the contour of the carboy shape. (Figure B).
-
Apply pressure over the entire surface area of the pad repeatedly to ensure good adhesion. The longer and more firmly pressure is applied, the better the adhesion.
-
Avoid contact with the cleaned surfaces of carboy while working with pads. Fingers and hands will leave undesirable oil residues. Repeat the cleaning prior to installing additional Carboy Bumpers if necessary.
-
Attach remaining pads until all have been installed.
-
Allow 72 hrs at room temperature for the adhesive to fully cure. Avoid exposure to any liquids during this time.

